Pour Over Coffee: Beginner’s Guide
There’s a reason pour over coffee has taken over specialty coffee shops around the world — and it has nothing to do with being trendy. It produces a cleaner, brighter, more nuanced cup than almost any other brew method. And once you understand the basics, it’s surprisingly simple to do at home.
This guide covers everything a beginner needs to know: what pour over is, what equipment you need, how to choose between the Kalita Wave, V60, and Chemex, and a step-by-step recipe to brew your first great cup.
By the end of this guide, you’ll have everything you need to brew café-quality pour over coffee at home — every single morning.
⚡ Quick Navigation:
→ What is Pour Over Coffee?
→ Equipment You Need
→ Kalita vs V60 vs Chemex
→ Step-by-Step Brew Guide
→ Common Mistakes to Avoid
→ FAQ
What is Pour Over Coffee?
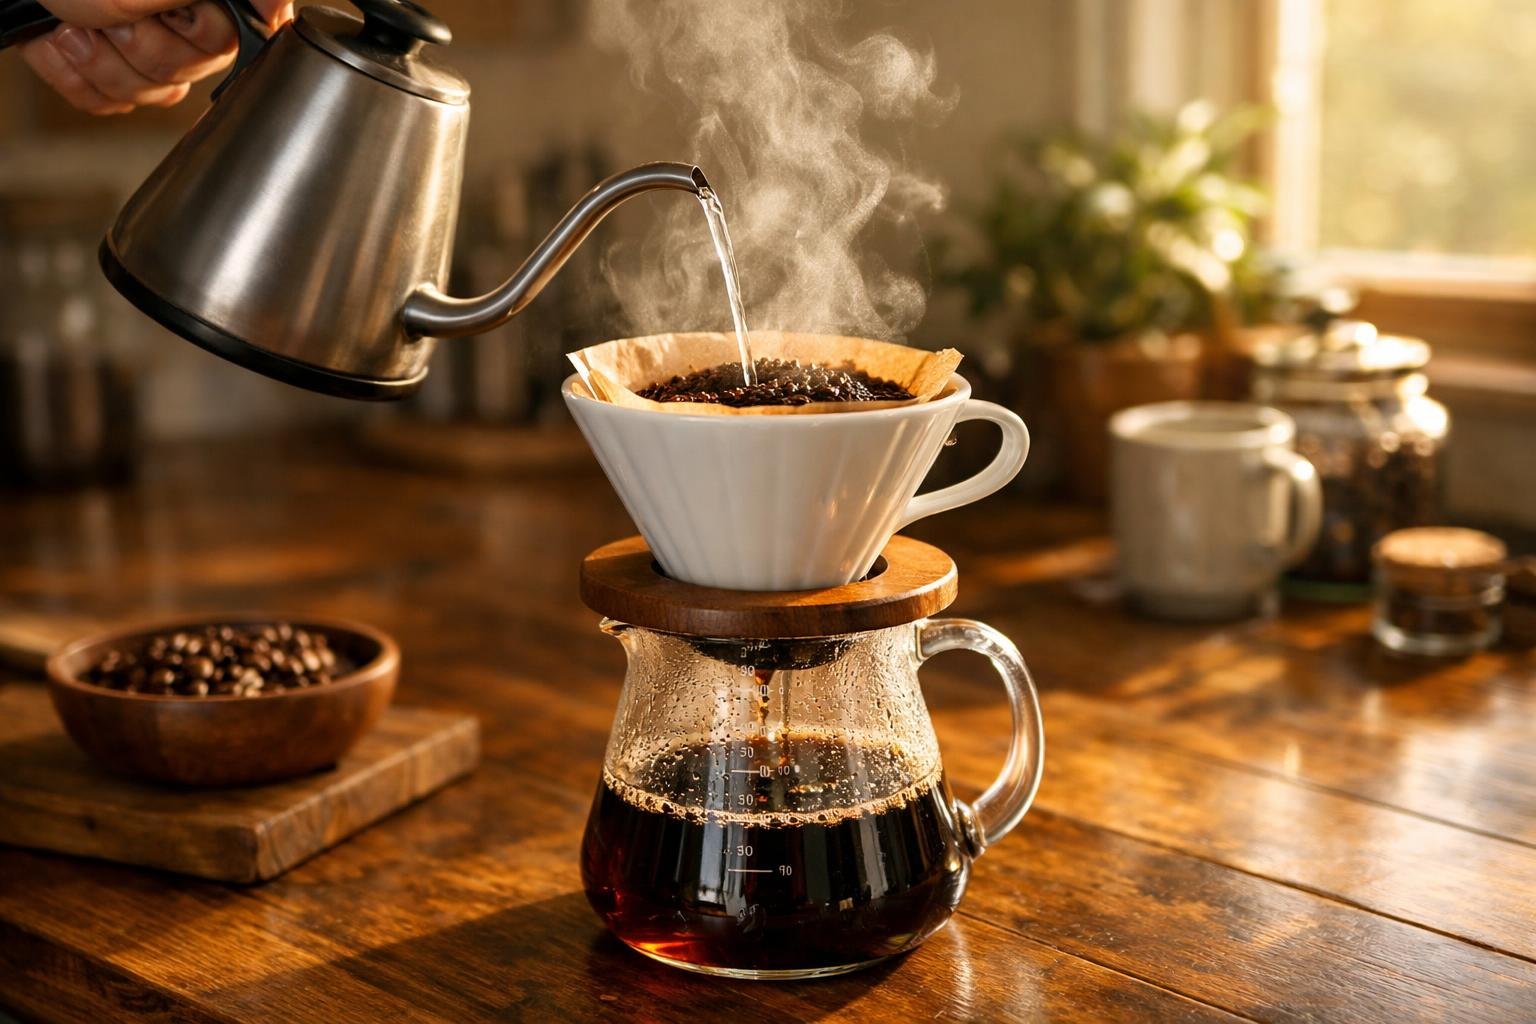
Pour over is a manual brewing method where hot water is poured slowly and deliberately over coffee grounds held in a filter. The water passes through the grounds by gravity, extracting flavor as it goes, and drips into a cup or carafe below.
Unlike an automatic drip machine — which sprays water unevenly and rushes the process — pour over gives you complete control over every variable: water temperature, pour rate, contact time, and flow. That control is what produces a noticeably cleaner, more flavorful cup.
The result is coffee that tastes like the beans actually intended — bright, clear, and full of complexity that drip machines tend to flatten out.
Equipment You Need
You don’t need a lot to brew great pour over coffee — but the right tools make a real difference. Here’s what’s essential and what’s optional.
Essential Equipment
1. Pour Over Dripper
The dripper holds your filter and grounds. We cover the three main options in detail below — but for beginners, we recommend starting with the Kalita Wave 185. It’s the most forgiving dripper available and produces consistently excellent results.
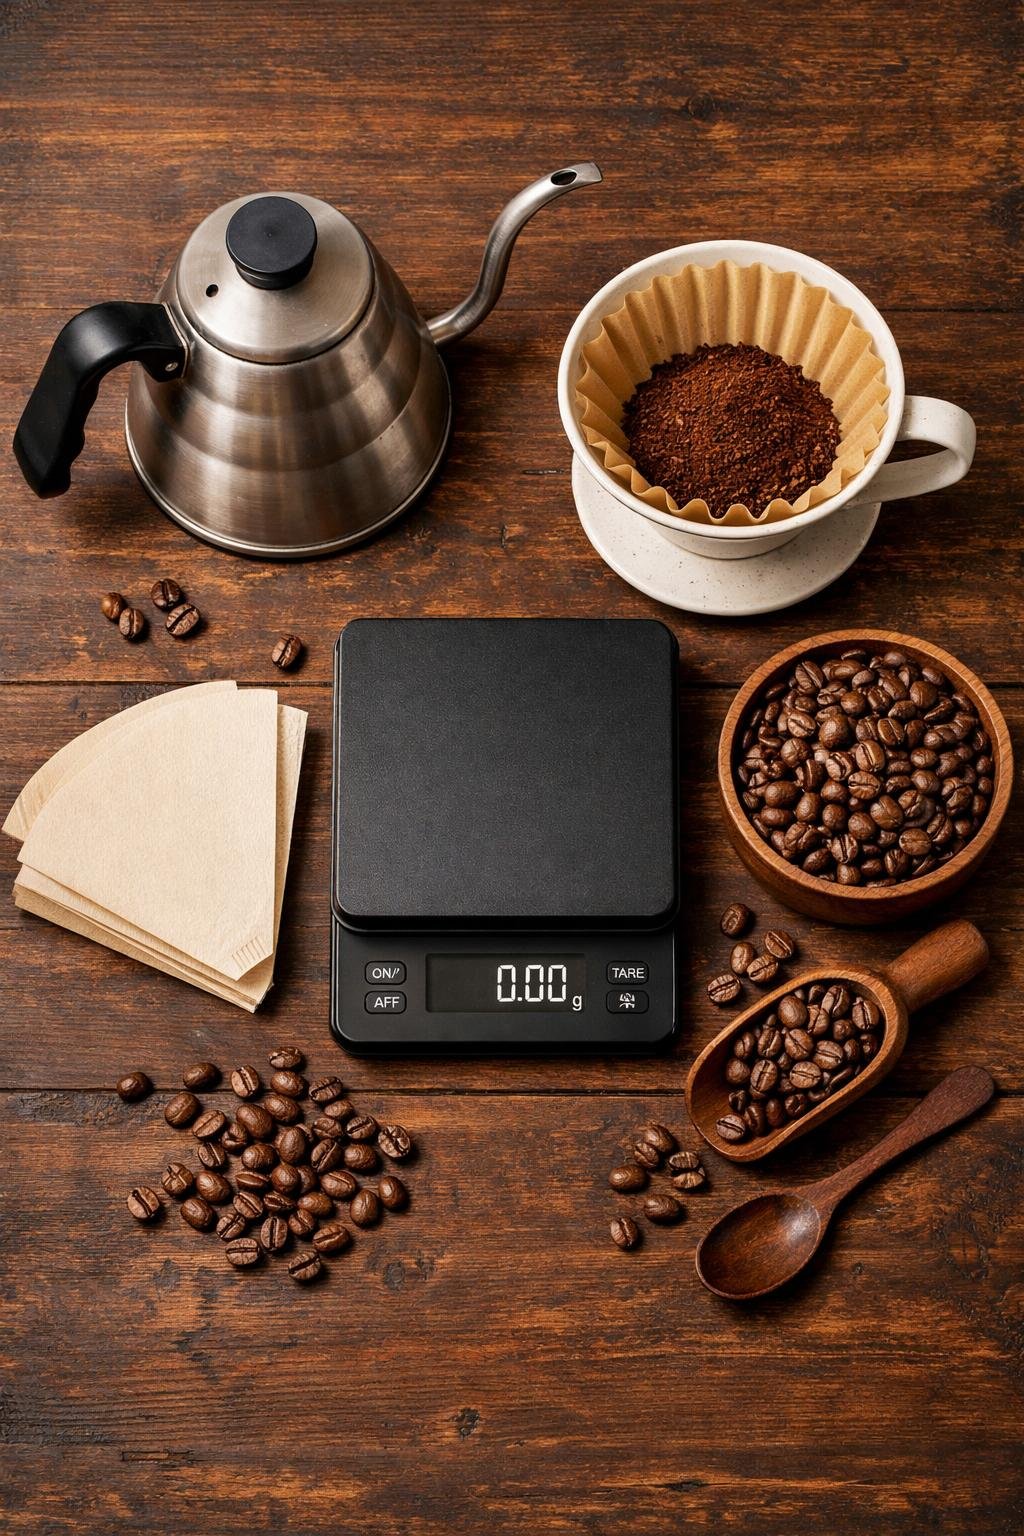
2. Gooseneck Kettle
A gooseneck kettle is non-negotiable for pour over. The long, curved spout gives you precise control over your pour rate and direction — impossible to achieve with a regular kettle. The Fellow Stagg EKG is the gold standard: variable temperature control, a built-in brew timer, and beautiful design.
3. Kitchen Scale
Measuring coffee by weight (not scoops) is the single most important habit for consistent pour over. A simple kitchen scale that measures in grams is all you need. The OXO Brew Scale is reliable, easy to use, and budget-friendly.
4. Burr Grinder
Freshly ground coffee is essential for pour over. A burr grinder produces the consistent grind size that pour over demands. See our full guide to the best burr grinders for recommendations at every budget.
Optional but Helpful
A brew timer (your phone works fine), a thermometer if your kettle doesn’t have temperature control, and a dedicated pour over carafe or mug warmer if you like your coffee piping hot.
Kalita Wave vs V60 vs Chemex: Which Should You Choose?
The three most popular pour over drippers each produce a slightly different cup and suit different skill levels. Here’s how to choose.
| Dripper | Best For | Skill Level | Cup Profile | Price |
|---|---|---|---|---|
| Kalita Wave 185 | Beginners, consistency | ⭐ Beginner | Balanced, smooth, forgiving | ~$35–$50 |
| Hario V60 | Enthusiasts, experimentation | ⭐⭐ Intermediate | Bright, clean, nuanced | ~$15–$45 |
| Chemex 6-Cup | Batches, entertaining | ⭐⭐ Intermediate | Ultra-clean, tea-like, elegant | ~$45–$55 |
Kalita Wave 185 — Best for Beginners
The Kalita Wave’s flat-bottomed design with three small drainage holes is what makes it so beginner-friendly. Unlike cone-shaped drippers, it doesn’t punish you for an imperfect pour. Water distributes evenly across the flat coffee bed, producing consistent extraction every time regardless of technique. If you’re just starting out, start here.
Hario V60 — Best for Enthusiasts
The V60 is the most iconic pour over dripper in specialty coffee — used in cafés worldwide and beloved by home brewers who want to push their technique. Its conical shape and single large drain hole mean water flows through quickly, and the flavor of your cup is heavily influenced by your pouring technique. Done right, the V60 produces an extraordinarily bright, clean, layered cup. It rewards practice and precision.
Chemex 6-Cup — Best for Batches
The Chemex is as much a piece of art as it is a brewer — it has been part of the permanent collection at the Museum of Modern Art in New York since 1943. Beyond its stunning design, the Chemex excels at brewing large batches (up to 6 cups at a time) with a distinctive ultra-clean, tea-like clarity. If you regularly brew for multiple people or love an exceptionally clean cup, the Chemex is your brewer.
Step-by-Step Pour Over Brew Guide
This recipe is written for the Kalita Wave 185 — the most beginner-friendly dripper. The same principles apply to the V60 and Chemex with minor adjustments.
📋 Recipe at a Glance
Coffee: 20g (about 3 tablespoons)
Water: 300g (about 1¼ cups)
Ratio: 1:15 (coffee to water)
Water Temp: 200°F (93°C)
Grind Size: Medium-fine (like coarse sand)
Total Brew Time: 3–4 minutes
Step 1 — Heat Your Water
Heat water to 200°F (93°C). If your kettle doesn’t have temperature control, bring it to a full boil and let it sit for 30 seconds. Water that’s too hot makes coffee bitter; too cool and you’ll get flat, under-extracted coffee.
Step 2 — Rinse Your Filter
Place your filter in the dripper, set it over your cup or carafe, and rinse it with hot water. This removes the papery taste from the filter and pre-heats your brewing equipment. Discard the rinse water.
Step 3 — Add Your Coffee
Grind 20g of coffee to a medium-fine consistency — similar to coarse sand. Add it to the rinsed filter and gently shake the dripper to level the coffee bed. Place the whole setup on your scale and tare it to zero.
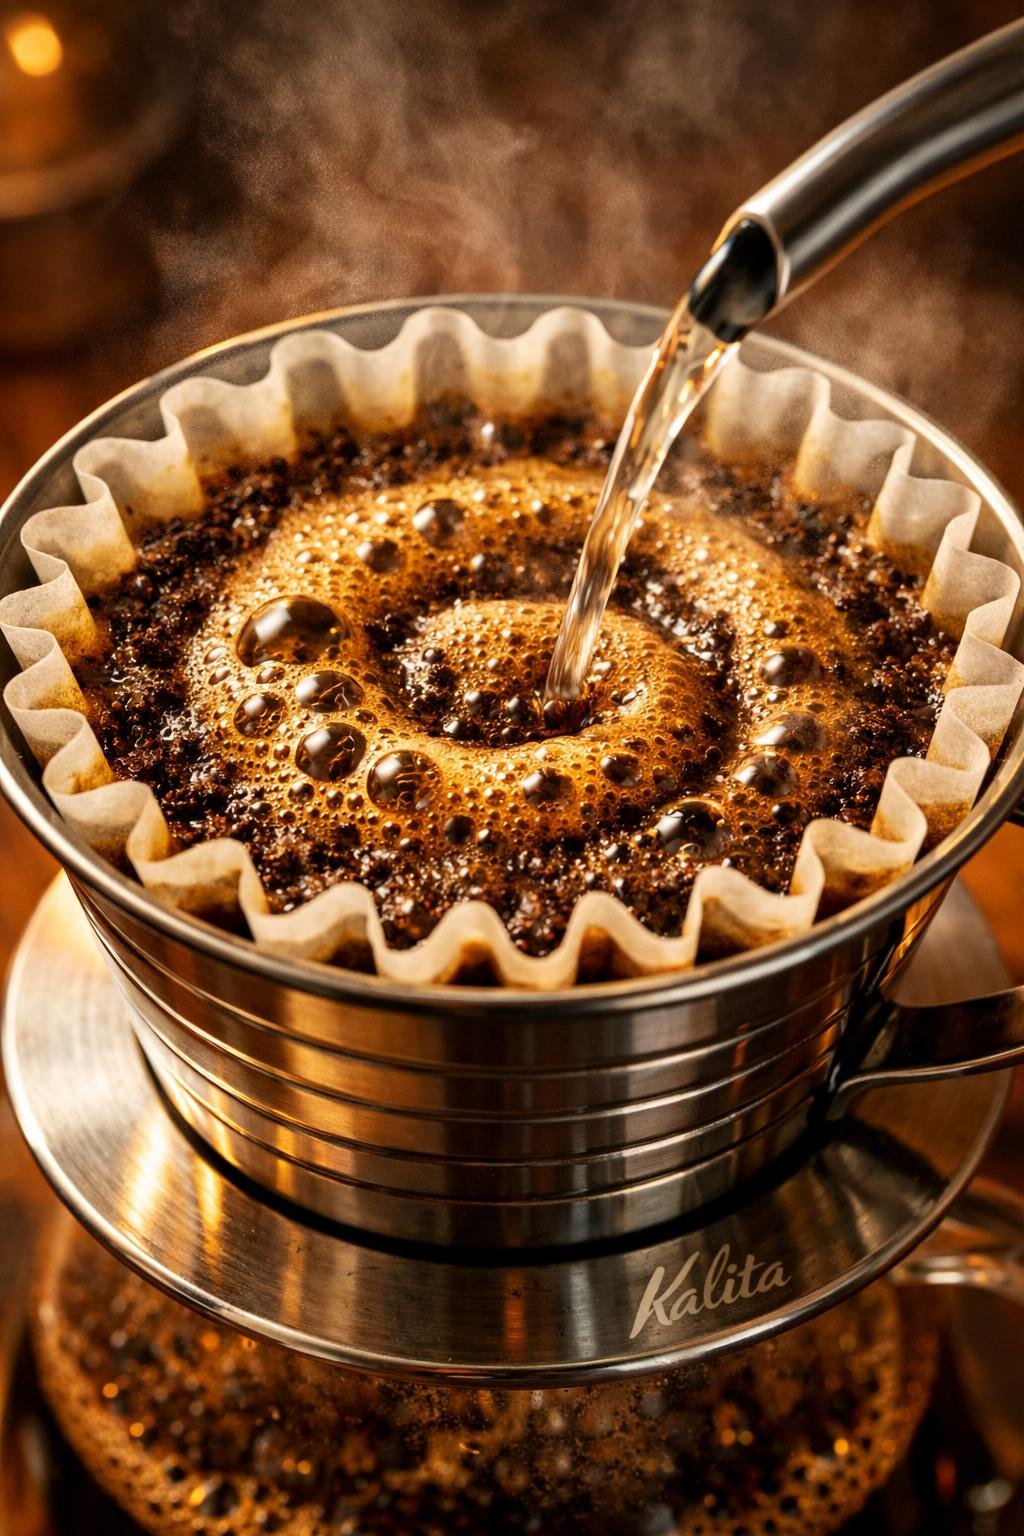
Step 4 — The Bloom (0:00–0:45)
Start your timer and pour 40–60g of water evenly over all the grounds in a slow spiral. You’ll see the coffee “bloom” — puffing up and releasing CO₂ gases trapped in the beans. Let this sit for 30–45 seconds.
Step 5 — First Pour (0:45–1:30)
Pour slowly in a steady spiral from the center outward, bringing the total water weight to 150g. Keep your pour slow and controlled — about 5–7g per second.
Step 6 — Second Pour (1:30–2:30)
Once the water level drops slightly, pour again in a slow spiral bringing the total to 225g. Keep your pours gentle and avoid pouring directly onto the filter walls.
Step 7 — Final Pour (2:30–3:00)
Pour the remaining water to reach your target of 300g total. Let it draw down completely. Your total brew time should be between 3:00 and 4:00 minutes.
Step 8 — Taste and Adjust
Taste your coffee and adjust based on what you find:
- Too bitter or harsh? Grind coarser or use slightly cooler water
- Too sour, weak, or flat? Grind finer or use slightly hotter water
- Brew time too fast (<3 min)? Grind finer
- Brew time too slow (>4 min)? Grind coarser
5 Common Pour Over Mistakes (And How to Fix Them)
1. Using Water That’s Too Hot or Too Cold
Boiling water (212°F) scorches coffee and produces bitter cups. Cold water under-extracts and tastes flat. The sweet spot is 195–205°F. A variable temperature kettle like the Fellow Stagg EKG takes all the guesswork out of this.
2. Skipping the Bloom
This is the most common beginner mistake. The bloom is essential for even extraction — skipping it means CO₂ interferes with water penetrating the grounds evenly. Always bloom for at least 30 seconds.
3. Pouring Too Fast
Dumping water in quickly causes channeling — where water finds the path of least resistance through the coffee bed rather than extracting evenly. Pour slowly and deliberately in a spiral pattern. A gooseneck kettle makes this much easier to control.
4. Using Pre-Ground or Stale Coffee
Pour over highlights the quality of your beans more than any other brew method. Stale coffee or pre-ground coffee will taste flat no matter what you do. Buy fresh, buy whole bean, and grind right before brewing.
5. Not Using a Scale
Eyeballing coffee and water by volume is inconsistent. Weighing in grams takes 30 extra seconds and completely eliminates this variable. The OXO Brew Scale is simple and affordable.
Frequently Asked Questions
Is pour over coffee stronger than drip?
Not necessarily stronger, but noticeably more flavorful and cleaner. Strength depends on your coffee-to-water ratio. What changes is clarity and complexity, not caffeine content.
How long does pour over coffee take?
From start to finish — including boiling water and grinding — expect about 8–10 minutes. The actual brew time is 3–4 minutes. Most people find the process meditative and enjoyable rather than a chore.
What’s the best coffee for pour over?
Pour over works beautifully with light to medium roasts — especially single-origin coffees from Ethiopia, Kenya, or Colombia. Always buy freshly roasted whole beans and grind just before brewing.
Do I need a gooseneck kettle for pour over?
Technically no — but practically yes. A standard kettle pours too fast and too uncontrollably for good pour over technique. The Fellow Stagg EKG is our top recommendation.
Can I make pour over without a scale?
You can, but your results will be inconsistent. A rough guide without a scale: use 2–3 tablespoons of coffee per 8 oz of water. For consistently great pour over though, a scale is the single best tool you can add.
Which is better — Kalita Wave or V60?
Neither is objectively better — they’re different tools for different preferences. Start with the Kalita Wave, graduate to the V60 when you’re ready to experiment.
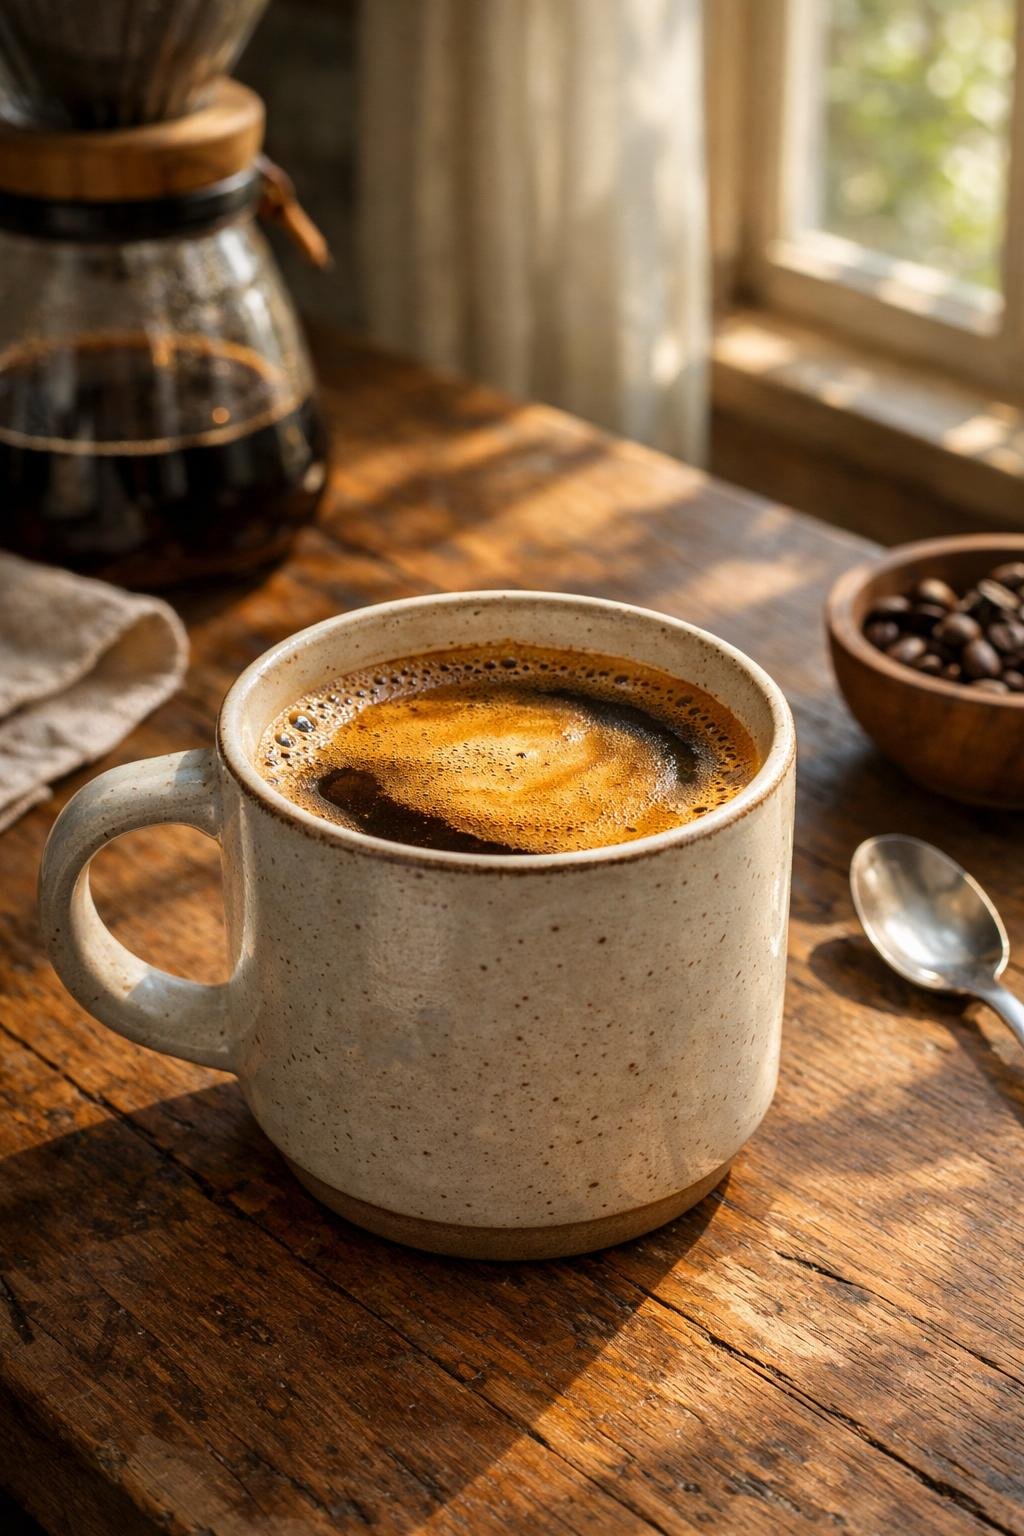
Final Thoughts
Pour over coffee rewards attention. It’s not complicated — but it does ask you to slow down, pay attention, and engage with the process. That’s exactly what makes it so satisfying.
Start with the Kalita Wave 185, a Fellow Stagg EKG kettle, and a good burr grinder. Follow the recipe above. Taste, adjust, and repeat. Within a week you’ll be brewing coffee better than most cafés. ☕
More from BrewElevate:
→ Best Burr Grinders for Every Budget (2026)
→ Best Home Espresso Machines of 2026
→ Best Coffee Beans for Espresso