How to Make Cold Brew Coffee at Home
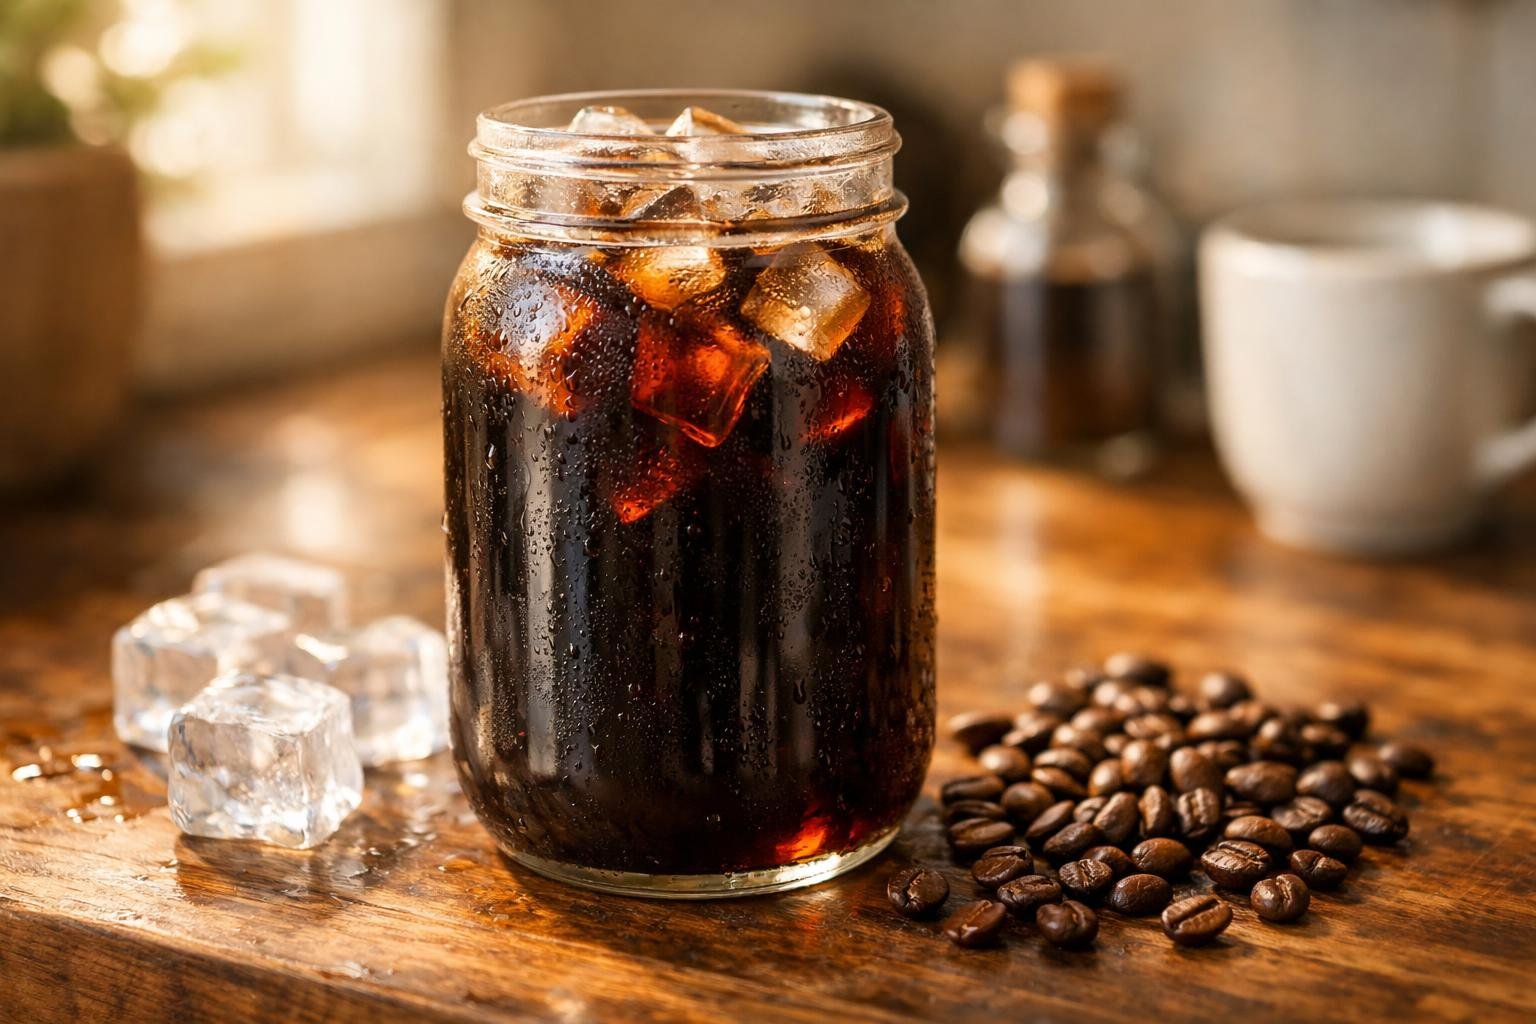
How to Make Cold Brew Coffee at Home — Cold brew is one of those things that sounds more complicated than it actually is. No special equipment required. No barista skills needed. Just coffee, water, time — and a result that’s smoother, less acidic, and more naturally sweet than anything you’ll get from a hot brew poured over ice.
Once you make your first batch at home, you’ll never pay $6 for a cold brew at a café again. A single batch costs less than $3 to make, lasts up to two weeks in your fridge, and takes about five minutes of actual hands-on time. The other 12 to 24 hours? Your refrigerator does the work.
This guide covers everything — the exact ratio, the best beans to use, how long to steep, how to strain it, and how to customize your cold brew for every taste preference. Whether you’re making it in a mason jar or a dedicated cold brew maker, I’ve got you covered.
☕ Best Cold Brew Coffee Makers
✅ OXO Good Grips Cold Brew Coffee Maker — best overall, no-mess drain tap
✅ Toddy Cold Brew System — best for large batches, café-quality results
✅ Takeya Patented Cold Brew Coffee Maker — best budget pick, airtight & BPA-free
What You’ll Need
| Item | What to Use | Notes |
|---|---|---|
| Coffee | Coarsely ground, medium-dark roast | Fresh beans make a big difference |
| Water | Cold or room temperature filtered water | Filtered tastes cleaner |
| Container | Mason jar, pitcher, or cold brew maker | At least 32 oz capacity |
| Strainer | Fine mesh strainer + cheesecloth or paper filter | Or use a dedicated cold brew maker |
| Grinder | Burr grinder set to coarse | Pre-ground works but fresh is better |
| Time | 12–24 hours | 12 hrs = lighter, 24 hrs = stronger |
How to Make Cold Brew Coffee: Step-by-Step
Step 1 — Get the Ratio Right
The standard cold brew ratio is 1:4 coffee to water for a concentrate, or 1:8 for a ready-to-drink brew. I recommend starting with the concentrate method — it gives you more flexibility. You can dilute it with water, milk, or oat milk to taste when you pour each glass.
🧮 The Simple Formula (Concentrate):
• 1 cup coarsely ground coffee
• 4 cups cold filtered water
• Makes approximately 3 cups of concentrate (serves 6–8 glasses when diluted)
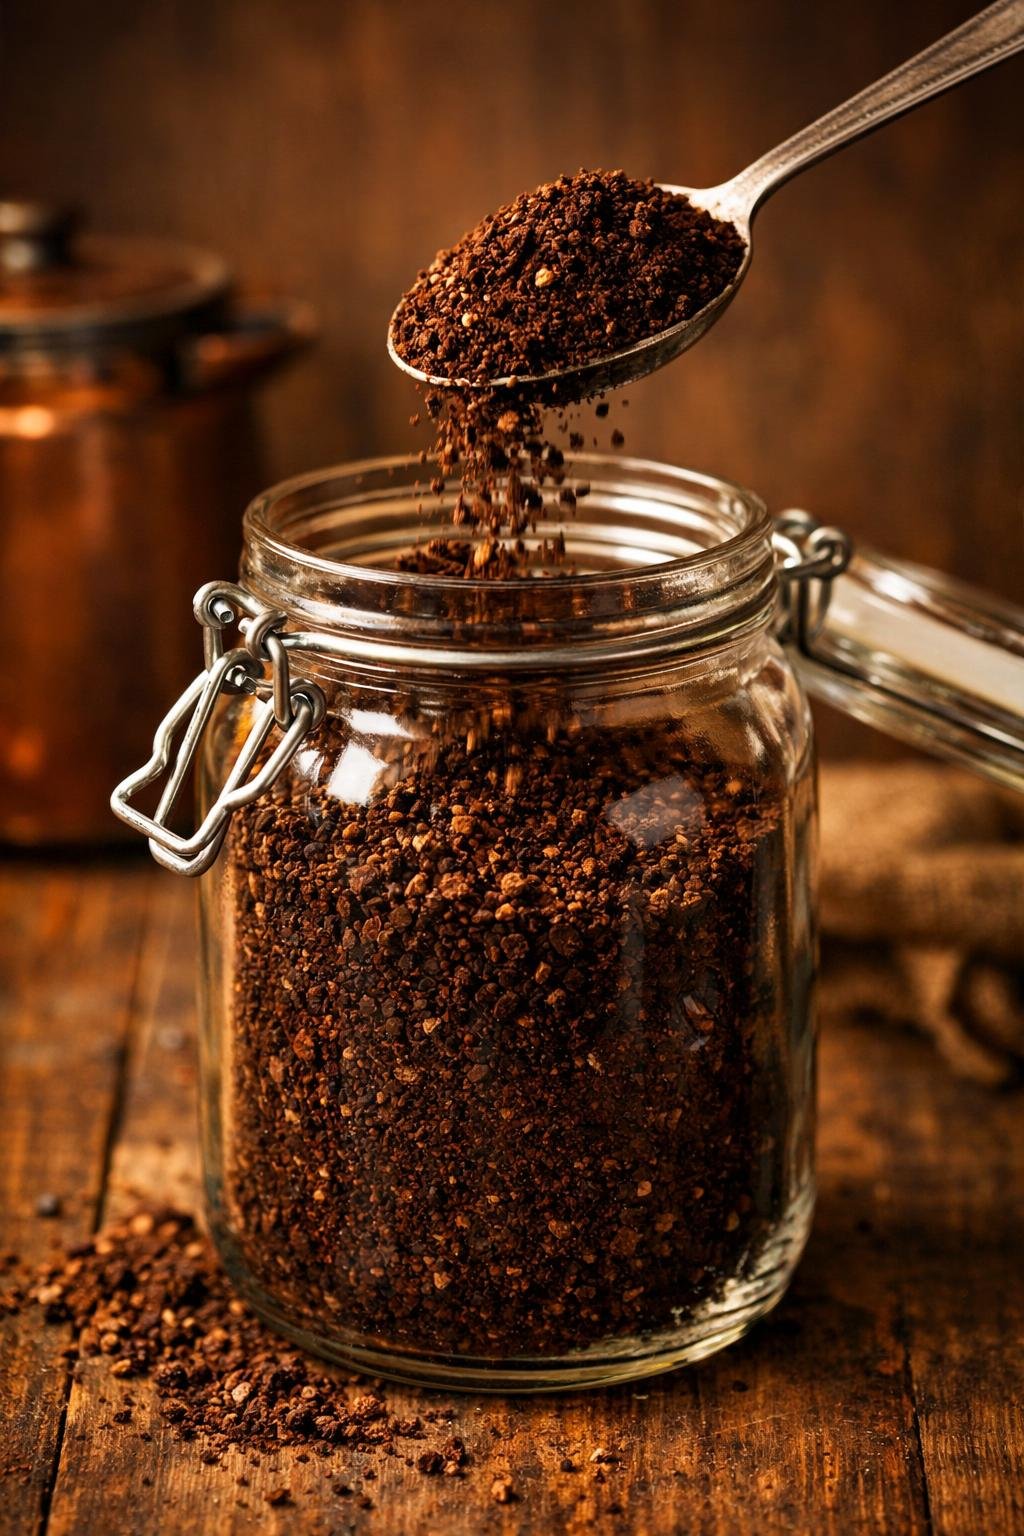
Step 2 — Grind Your Coffee Coarse
Grind size is one of the most important variables in cold brew. You want a coarse grind — similar to raw sugar or coarse sea salt. Too fine and you’ll get an over-extracted, bitter brew that’s difficult to strain. Too coarse and you’ll under-extract and get a weak, watery result.
If you have a burr grinder, set it to the coarsest or second-coarsest setting. If you’re buying pre-ground, look for bags specifically labeled “cold brew grind” — some brands offer this. Don’t use espresso grind or standard drip grind for cold brew.
Step 3 — Combine Coffee and Water
Add your ground coffee to your container — a large mason jar, a pitcher, or a dedicated cold brew maker all work equally well. Pour your cold or room-temperature filtered water over the grounds slowly, making sure all the coffee is saturated. Give it a gentle stir to make sure there are no dry pockets of coffee hiding at the top.
Cover your container with a lid, plastic wrap, or a plate — anything to keep it sealed — and place it in the refrigerator.
Step 4 — Steep for 12 to 24 Hours
This is where the magic happens — and where you do absolutely nothing. Let your cold brew steep in the refrigerator for:
- 12 hours — Lighter, brighter, slightly more acidic. Great if you prefer a milder cup.
- 18 hours — The sweet spot for most people. Smooth, balanced, naturally sweet.
- 24 hours — Bold, rich, full concentrate strength. Perfect for milk drinks or if you like strong coffee.
Don’t steep longer than 24 hours — you’ll start getting bitter, over-extracted flavors that no amount of ice or milk can fix.
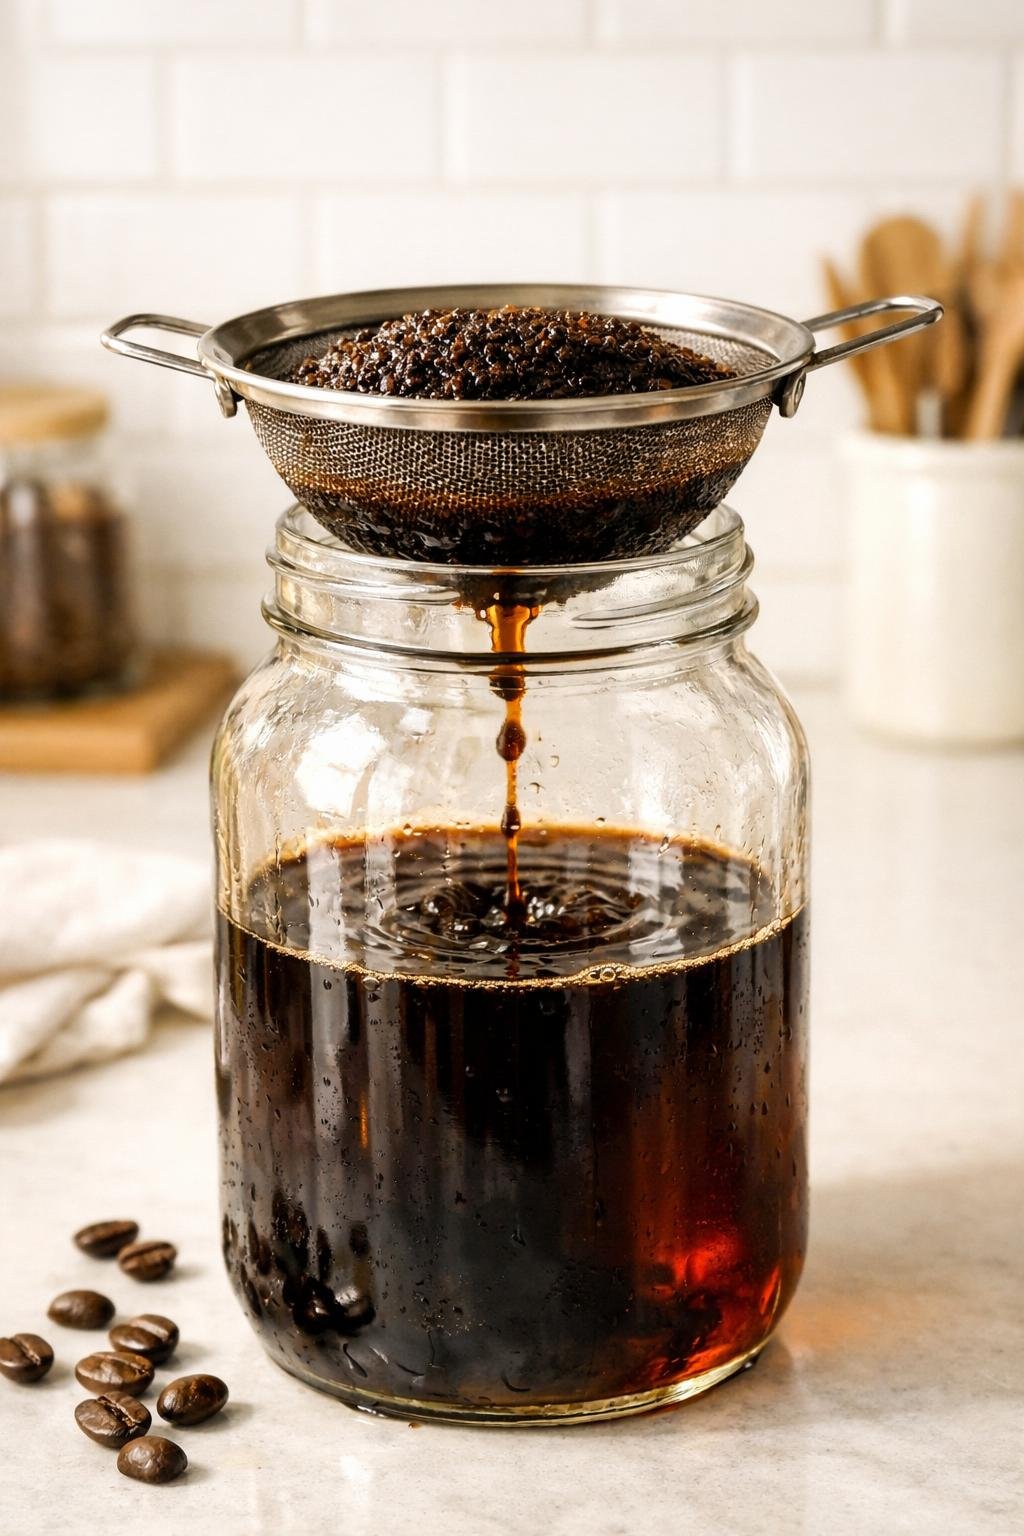
Step 5 — Strain the Coffee
Once your steep time is up, it’s time to separate the grounds from your beautiful cold brew concentrate. Here’s how to do it cleanly:
Mason Jar Method: Set a fine mesh strainer over a large bowl or second jar. Line it with a cheesecloth or a paper coffee filter. Pour the cold brew through slowly. This takes 5–10 minutes but produces a clean, sediment-free concentrate.
Cold Brew Maker Method: If you’re using a dedicated cold brew maker (like the OXO or Toddy), simply lift out the filter basket — it strains automatically as you remove it. Much faster and cleaner.
Transfer your strained concentrate to a clean jar or bottle with a lid. Store in the refrigerator for up to two weeks.
Step 6 — Serve and Enjoy
If you made a concentrate, dilute it 1:1 with water, milk, or oat milk over ice. If you made a ready-to-drink brew at the 1:8 ratio, pour it straight over ice. Add your favorite sweetener, a splash of vanilla, or a pour of cream — or drink it black and let the natural sweetness of the cold brew speak for itself.
Free Recipe Guide
Stop Paying $6 for Cold Brew ☕
Get 5 Starbucks copycat recipes — each under $1 to make at home — delivered straight to your inbox. Free.
Get the Free Recipes →Best Cold Brew Makers — If You Want to Upgrade Your Setup
A mason jar works perfectly well — but if you’re making cold brew regularly, a dedicated cold brew maker makes the whole process faster, cleaner, and more consistent. Here are the ones worth considering:
OXO Good Grips Cold Brew Coffee Maker — Best Overall
Best for: Home brewers who want the cleanest, most consistent cold brew with zero mess
The OXO Cold Brew Coffee Maker is the gold standard for home cold brew. It holds up to 32 oz of concentrate, has a perforated rainmaker lid that evenly saturates all the grounds, and features a simple tap-release drain mechanism that lets you drain the concentrate directly into your carafe without lifting, pouring, or filtering. It’s genuinely the cleanest cold brew experience you can have at home.
Toddy Cold Brew System — Best for Large Batches
Best for: Cold brew enthusiasts who make large batches and want café-quality results
The Toddy is the original cold brew system — it’s been around since 1964 and is still used by many specialty coffee shops to make their cold brew concentrate. It produces a remarkably smooth, low-acid concentrate using a reusable felt filter that removes even the finest sediment. If you’re serious about cold brew and want the system that professionals trust, the Toddy is it.
Takeya Patented Deluxe Cold Brew Coffee Maker — Best Budget Pick
Best for: Anyone who wants a dedicated cold brew maker without spending a lot
The Takeya is one of the most popular cold brew makers on Amazon — and for good reason. It’s affordable, BPA-free, holds one quart of concentrate, and has a built-in fine mesh filter that makes straining effortless. The airtight lid keeps your concentrate fresh in the fridge for up to two weeks. If you’re just getting started with cold brew at home and want something better than a mason jar without breaking the bank, the Takeya is the move.
Cold Brew Variations to Try
Classic Cold Brew Over Ice
Dilute your concentrate 1:1 with cold filtered water. Pour over a glass full of ice. Drink black or add a splash of cream. This is cold brew in its purest form — smooth, naturally sweet, and deeply satisfying.
Cold Brew Latte
Dilute concentrate 1:1 with your milk of choice — whole milk, oat milk, almond milk, or coconut milk all work beautifully. Pour over ice. Add a pump of vanilla syrup if you want to recreate that café latte experience at home for a fraction of the price.
Brown Sugar Cold Brew
Make a quick brown sugar simple syrup (equal parts brown sugar and hot water, stirred until dissolved, cooled). Add 1–2 tablespoons to your cold brew over ice with a splash of oat milk. This is the home version of Starbucks’ Brown Sugar Oat Milk Shaken Espresso — and it’s better.
Cold Brew Tonic
Pour a small amount of cold brew concentrate over ice, then top with tonic water. The bitterness of the tonic plays beautifully against the smooth sweetness of the cold brew. Add a slice of orange or a sprig of mint for a café-worthy presentation. Surprisingly refreshing.
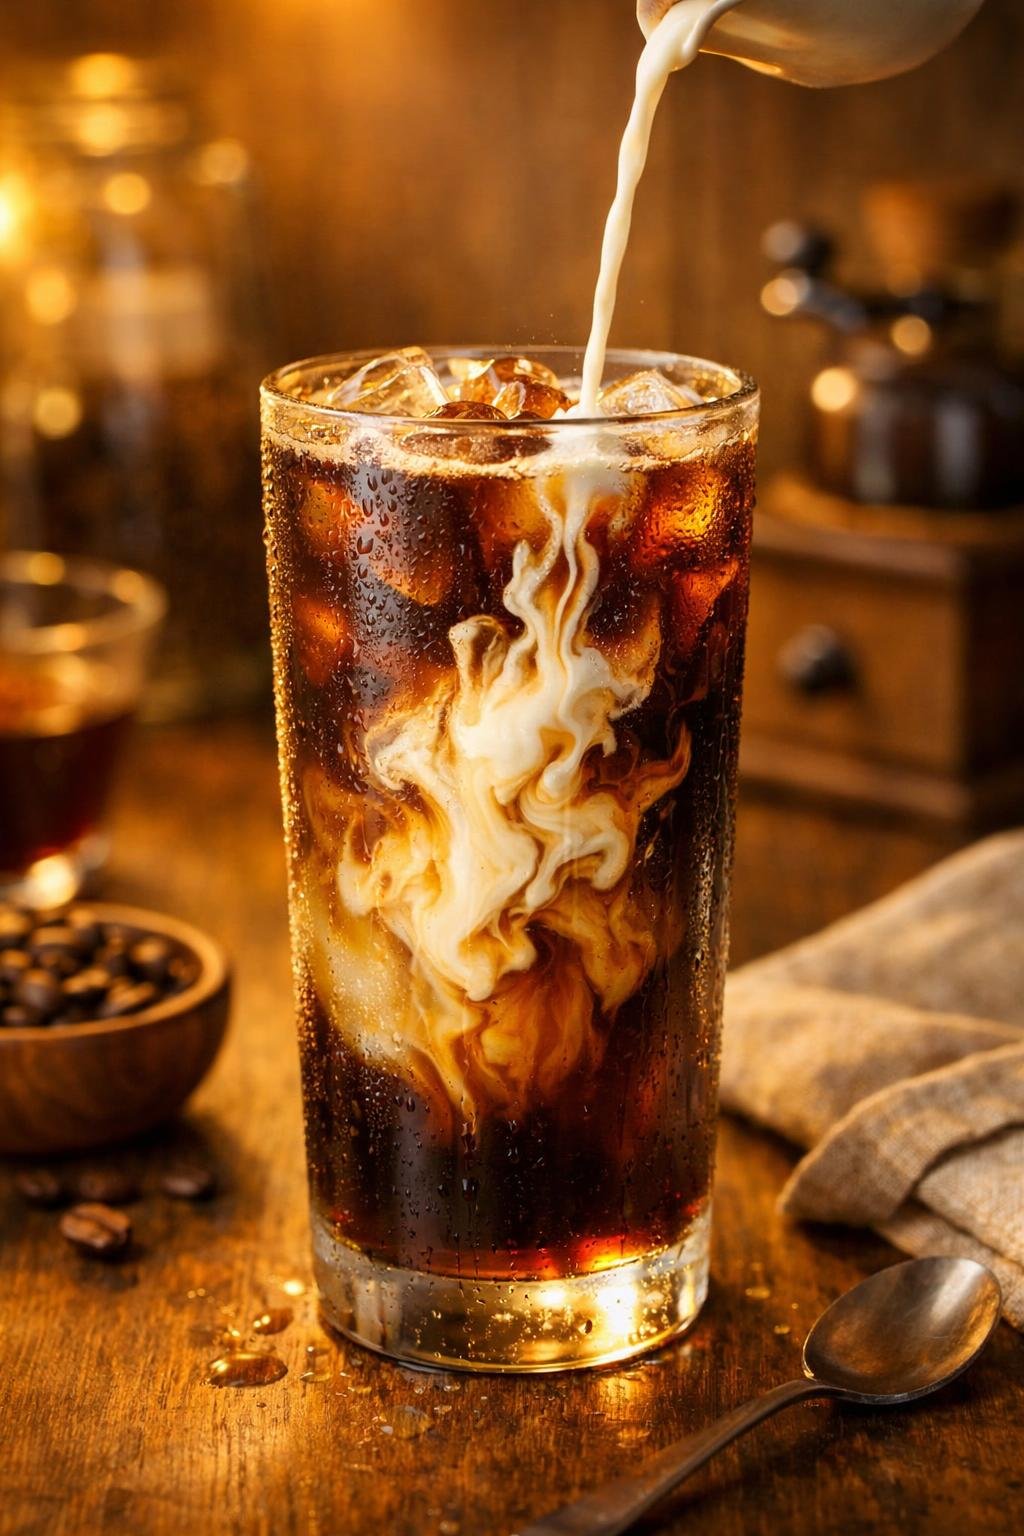
Vanilla Sweet Cream Cold Brew
Whisk together 2 tablespoons of heavy cream, 1 tablespoon of milk, and ½ teaspoon of vanilla extract until slightly thickened. Pour your cold brew over ice, then slowly pour the sweet cream over the back of a spoon so it floats on top. Watch it cascade down through the coffee. This is the drink that made Starbucks famous — and you can make it at home in minutes.
Frequently Asked Questions
How long does cold brew last in the fridge?
Cold brew concentrate stored in an airtight container in the refrigerator stays fresh for up to two weeks. Ready-to-drink cold brew (already diluted) is best consumed within 3–5 days. The concentrate lasts longer because it hasn’t been diluted — diluting it introduces more oxygen and speeds up the staling process.
Can I make cold brew at room temperature?
Yes — room temperature cold brew steeps faster, typically 8–12 hours instead of 12–24. However, I recommend the refrigerator method for food safety and because the slower, colder extraction produces a noticeably smoother, less acidic result. If you’re in a hurry, room temperature works — just don’t leave it out longer than 12 hours.
What’s the difference between cold brew and iced coffee?
Iced coffee is hot-brewed coffee that’s been cooled and poured over ice. Cold brew is never exposed to heat — it’s brewed entirely in cold water over a long period. The result is dramatically different: cold brew is smoother, less acidic, naturally sweeter, and has a heavier body than iced coffee. If you’ve ever found iced coffee too bitter or harsh, cold brew will change your mind.
Does cold brew have more caffeine than regular coffee?
The concentrate does — because you’re using a higher ratio of coffee to water. But once diluted to a ready-to-drink ratio, the caffeine content is comparable to regular drip coffee. If you drink cold brew concentrate undiluted or with just a splash of milk, yes — you’re getting a significant caffeine hit. Dilute appropriately and it’s a normal cup of coffee in terms of caffeine.
What’s the best coffee to use for cold brew?
Medium to medium-dark roasts work best for cold brew — they produce the smoothest, most naturally sweet results. Light roasts can work but sometimes taste thin and sour in cold brew. Dark roasts produce a bold, chocolatey concentrate that’s excellent in milk drinks. For bean recommendations, check out our guide to the best coffee beans — most great espresso beans also make excellent cold brew.
Can I use pre-ground coffee for cold brew?
Yes — pre-ground works, especially if it’s labeled as a coarse grind. The freshness of the grind matters less in cold brew than in espresso because the long steep time compensates somewhat. That said, freshly ground beans from a quality burr grinder will always produce a noticeably better result. If you’re going to invest in one upgrade, a good grinder is it.
Final Verdict
Cold brew is one of the easiest, most rewarding things you can make at home. Five minutes of prep. One night in the fridge. Two weeks of smooth, café-quality cold coffee ready whenever you want it.
Start with a mason jar and whatever medium-roast beans you have on hand. Once you taste homemade cold brew, you’ll never go back to the overpriced café version. And once you’re hooked, the OXO Cold Brew Maker is the upgrade that makes the whole process cleaner and more consistent — worth every penny if cold brew becomes part of your daily routine.
Make a batch tonight. Thank yourself tomorrow morning. ☕